Spells and their effects
- Offensive Strategy
- A known strategy is to use Lightning Spells on the Dark Elixir Storage to easily steal Dark Elixir.
- It is very useful to take out an enemy's defenses such as Cannons, Archer Towers or Mortars.
- It is also very useful to take out enemy Clan Castle Troops.
- It can be used to destroy Mortars, or at least damage them significantly due to their relatively low hitpoints.
- It can be very useful if you need to just destroy a building to get a star.
- A good Trophy-hunting strategy is to use Lightning Spells to take out an Air Defense then deploy Dragons, although it takes 3 fully upgraded Lightning Spells to take out a lvl 2 Air Defense. Jorge Yao stated in his interview that he used that tactic to help him reach number one on the top players' list.
- Lightning Spells are usually used to take out or damage Defenses with relatively low hit-points.
- 5 level 6 lightning spells can take out a level 4 Town Hall (and lower) however this isn't a recommended method.
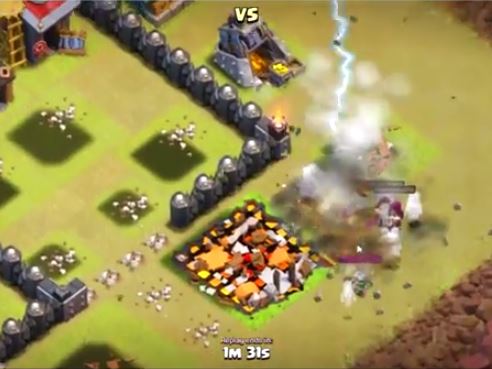
Dropping Lightning Spells on Clan Castle Troops
- Trivia
- The Lightning Spell's damage goes up by 30 points after every upgrade.
- It takes 2.4 seconds for all the lightning to strike.
- Currently, the Lightning Spell is the only available Spell that can damage buildings without the need for Troops.
- The Lightning Spell's damage goes up by 30 points after every upgrade.
- Summary
- The Healing Spell is a spell that can be used in Raids.
- It takes 30 minutes to create in the Spell Factory.
- When placed it forms a stationary ring of healing on the ground.
- Any friendly units within the ring will be healed (ground or air); it will even heal a Healer.
- It lasts for a total of 12 seconds (40 healing 'pulses' every 0.3 seconds).
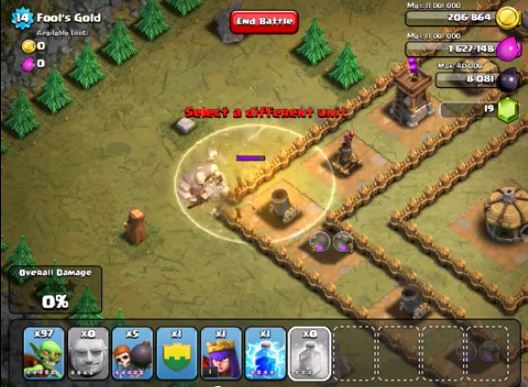
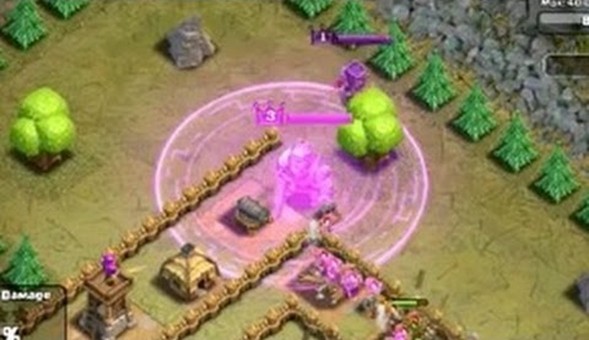
Using a Healing Spell on Giants.
- Offensive Strategy
- A good strategy is to place the Healing Spell in front of your Meat Shields to create a longer distraction.
- Before you place a Healing Spell, make sure that your Units will stay inside the Spell's radius for as long as possible.
- The Healing Spell goes well with the Rage Spell, due to the fact that the Rage Spell makes Troops faster and stronger while healing them makes them much more durable as well.
- It is very effective when used with high-health and/or slow troops.

Using the rage spell on Heroes can be very effective.
- Offensive Strategy
- The Rage Spell increases each individual unit's damage by a fixed percentage (which increases as the spell's level rises). Because of this, the spell is most effective when using it with high-damage Troops such as P.E.K.K.As and Dragons.
- Although Healers deal no damage, they can take advantage of the spell as well, as it will cause them to heal faster (and reduce the need for Healing Spells while the Rage Spell is active).
- The most effective placement of the Rage Spell is to position it approximately 3-4 squares toward where your Troops' next target will be; this will give your Troops the maximum amount of time inside the Rage Spell's area of effect as they destroy their current target and move to the next one. If you drop it directly under their feet, they will quickly move out of its range once they have finished with their current target.
- The Rage Spell goes well with the Healing Spell, due to the fact that the Rage Spell makes Troops faster and stronger while healing them makes them much more durable as well.
- Trivia
- The level 5 Rage Spell can cause P.E.K.K.As to destroy a Town Hall within seconds.
- When used on Heroes, they grow to about twice their original size.
- Although the Healing Spell has the same effect that Healers produce, there is no Troop that enrages units like the Rage Spell.
- The Rage Spell is substantially less effective when combined with Tier 1 and Tier 2 troops only, as they don't do much damage as compared to the Tier 3 troops. Your primary target should be your highest damage troops, and any Tier 1 and Tier 2 troops it happens to affect is simply extra damage.
- The P.E.K.K.A is especially well-suited for the Rage Spell, as she normally moves and attacks quite slowly.
- The Rage Spell's effects do not stack, even if multiple rage spells are used on the same location.
The Jump Spell

- Summary
- The Jump Spell allows all Troops and Heroes to jump Walls.
- There are only 2 available levels for the Jump Spell
- Upgrading the spell to level 2 will double its duration on the battlefield.
- The Jump Spell costs 4 million Elixir and 5 Days to upgrade to level 2
- Giants, Pekkas and Heros can't jump with level 1. They can with level 2.
- A level 1 Jump Spell costs 30,000 Gold to create
- A level 2 Jump Spell costs 38,000 Gold to create

Deploying the Jump Spell
- Offensive Strategy
- Make sure to always use the Jump Spell near Walls! If you accidentally use the Jump Spell elsewhere, it will have no effect, wasting the spell, your Elixir and your time.
- This spell is more effective on doubled or tripled Walls; otherwise the spell is not utilized to its maximum capability, making it much less valuable to use.
- Jump Spells cannot stack so be careful not to use them in the same place!
- Jump Spells can be quite useful for getting Troops deep into the interior of a base. Once Wall Breakers have initially breached the exterior Walls, any new ones tend to be attracted to adjacent cells rather than those behind the breach. A Jump Spell, however, can be placed behind the initial breach to quickly allow Ground Troops access to the second layer of the base where the storages and heavy defenses (Mortars, X-Bows, etc.) are typically positioned.
- Trivia
- The level of the Wall does not matter to the Jump Spell; Troops will be able to jump over Walls of any level.
- Jump Spells have no effect whatsoever on air units, Hog Riders or Wall Breakers in any way.
- It has the same area of effect as the Rage Spell.
- Level 2 doubles the spell's duration.
The Freeze Spell
- Summary
- The Freeze Spell is used to temporarily disable defenses and/or ground troops from the enemy Clan Castle within a small radius. Until the spell's duration finishes, the affected enemy units will neither move nor attack.
- The Freeze Spell is currently the final spell unlocked in the Spell Factory.
- At its maximum level, it is currently the most expensive spell in the game.
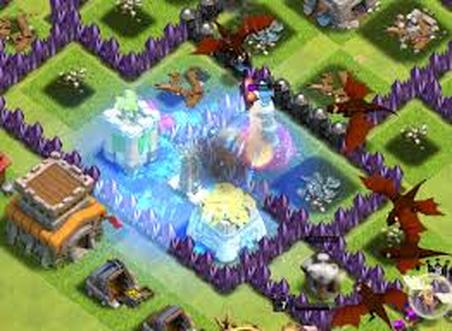
Freezing defenses with the rage spell
- Offensive Strategy
- It cannot freeze an enemy Hidden Tesla before it has been revealed.
- This spell can be used to freeze the Wizard Tower to allow your swarm of Barbarians or Archers to destroy it without being completely eliminated.
- It can also freeze an Air Defense, which will buy some time for your air units to get closer to the Air Defense to destroy it. This can be extremely effective when utilizing an all-Balloon army.
- The Freeze Spell can also be used to freeze X-Bows and Inferno Towers, allowing stronger units such as P.E.K.K.As to live longer without the Inferno Towers and weaker units such as Barbarians to live longer without the X-Bow.
- In the case of the Inferno Tower, the Freeze Spell is a much more effective option than the Healing Spell for keeping heavy troops alive in its vicinity, because healing is disabled for the Inferno Tower's targets. However, the Freeze Spell can completely negate the Inferno Tower for its entire duration, and once the spell's effect ends, the Inferno Tower's damage is reset to its initial state.
- It can also freeze powerful Clan Castle ground troops such as P.E.K.K.As and Wizards, buying your troops time to kill these units before they have a chance to wreak havoc on your attack plans. However, for weaker units, a Lightning Spell may be a more expedient (and cheaper) option.
- When most or all of your heavier units are destroyed, cast a Freeze Spell at area splash structures near the main part of your remaining army. This way, your Troops have a better chance at survival and may be able to take out the structure quickly before it becomes active again.
